
Mail Act-On is the WORKHORSE for processing email messages.
Mail Act-On’s horse-power comes from:
To install the Mail Act-On component of MailSuite, see MailSuite installation - Managing Components.
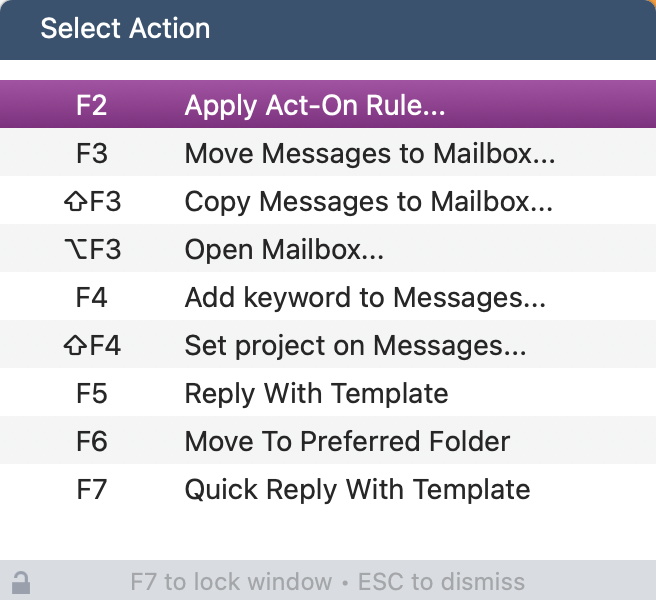
By default, call up the Mail Act-On menu using the F1 key. The menu displays the list of actions available to the selected messages.
**The Keywords and projects options are only available if you have MailSuite’s MailTags component installed.
The Main menu is handy if you cannot remember a shortcut, but each item on the menu can be accesses directly by its shortcut.
You can toggle to a different menu using its shortcut - F2 will display the “Apply Act-on Rule …” menu.
The esc key will close the menu.

Act-on Rules are applied manually to the selected message or group of messages. These are different from Apple’s default rules, which apply automatically to messages as they come into your inbox.
Use the “Apply Act-On Rules…” menu to apply the selected Act-On Rule to the selected messages.
Using F2 displays the list of Act-On Rules. If you have a long list of rules, you can type in the search field to filter the list to find the rule you want.
Apply the rule by selecting it and hitting “Return”, or type the “Act-On” key. When you use the Act-on Key, you do not need to hit “Return”.
The rule processes the selected messages, and a notification window lets you know the rule was applied.
Settings for Apply Act-On Rules… are in the Menu tab of the Mail Act-On settings.
Act-on Rules are created and edited in the Rules tab of Mail’s preferences.
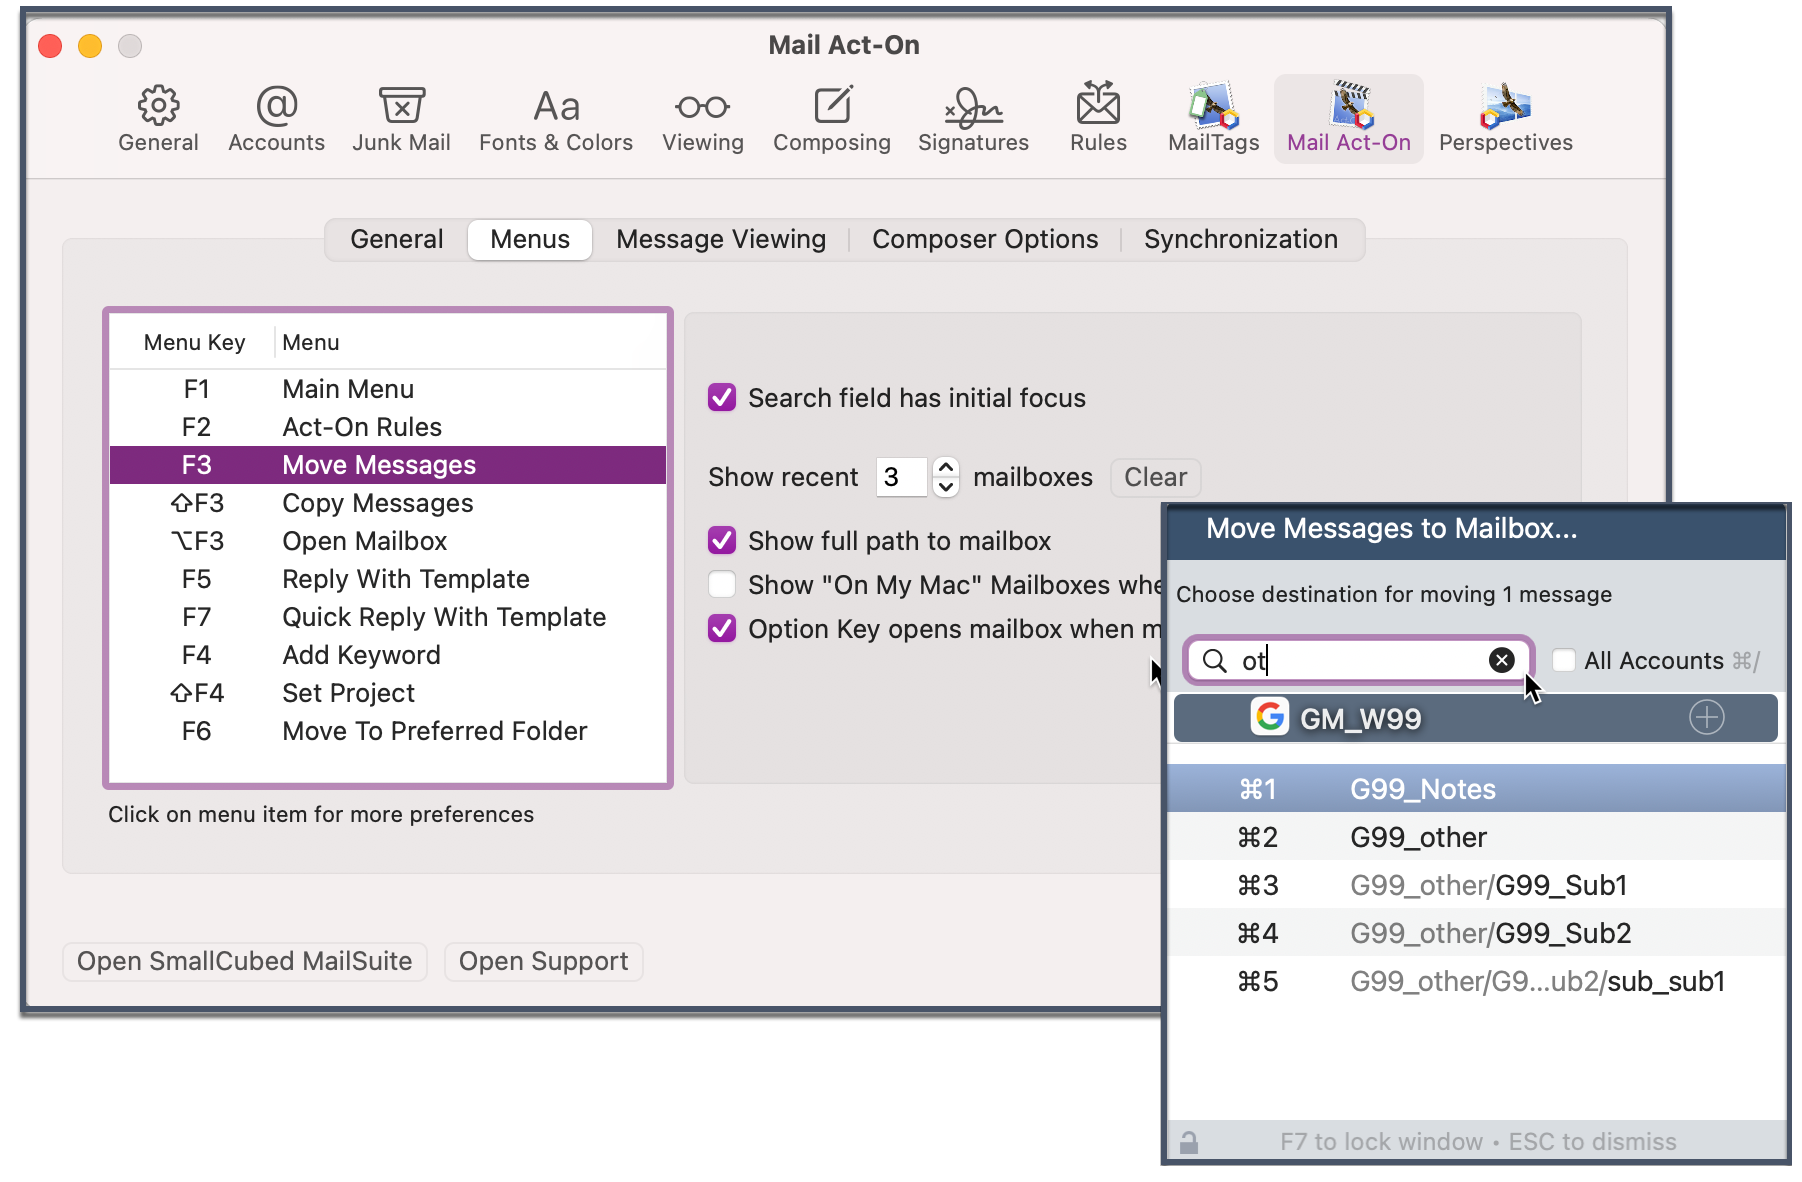
Move messages to Mailbox… will move selected messages to the selected mailbox.
Move messages to Mailbox… can be selected from the Main Act-On menu (F1) or using F3 directly.
From the Move messages to Mailbox… menu, you can select the mailbox you want.
Typing in the search field will filter the list of visible mailboxes.
The wanted mailbox is selected using command + # beside it or selecting the mailbox and clicking “Return”. When only one mailbox displays, you can just hit the “Return”.
The messages move to the selected mailbox, and a notification window will indicate that the action was taken.
By default, the Move messages to Mailbox… only displays the account mailboxes for the messages. Checking “All Accounts” shows the mailboxes from all accounts.
Command + forward-slash (⌘ + /) can be used to toggle between displaying the mailboxes for “All accounts” and displaying only the message account mailboxes.
To move a message to a mailbox and go to the selected Mailbox as a single action, hold the option key ( ⌥ ) when selecting the mailbox. The messages will be moved to the selected mailbox, and open that Mailbox.
There are a few default settings for the Move messages to Mailbox…. They can be found in the Menu tab of the Mail Act-On settings.
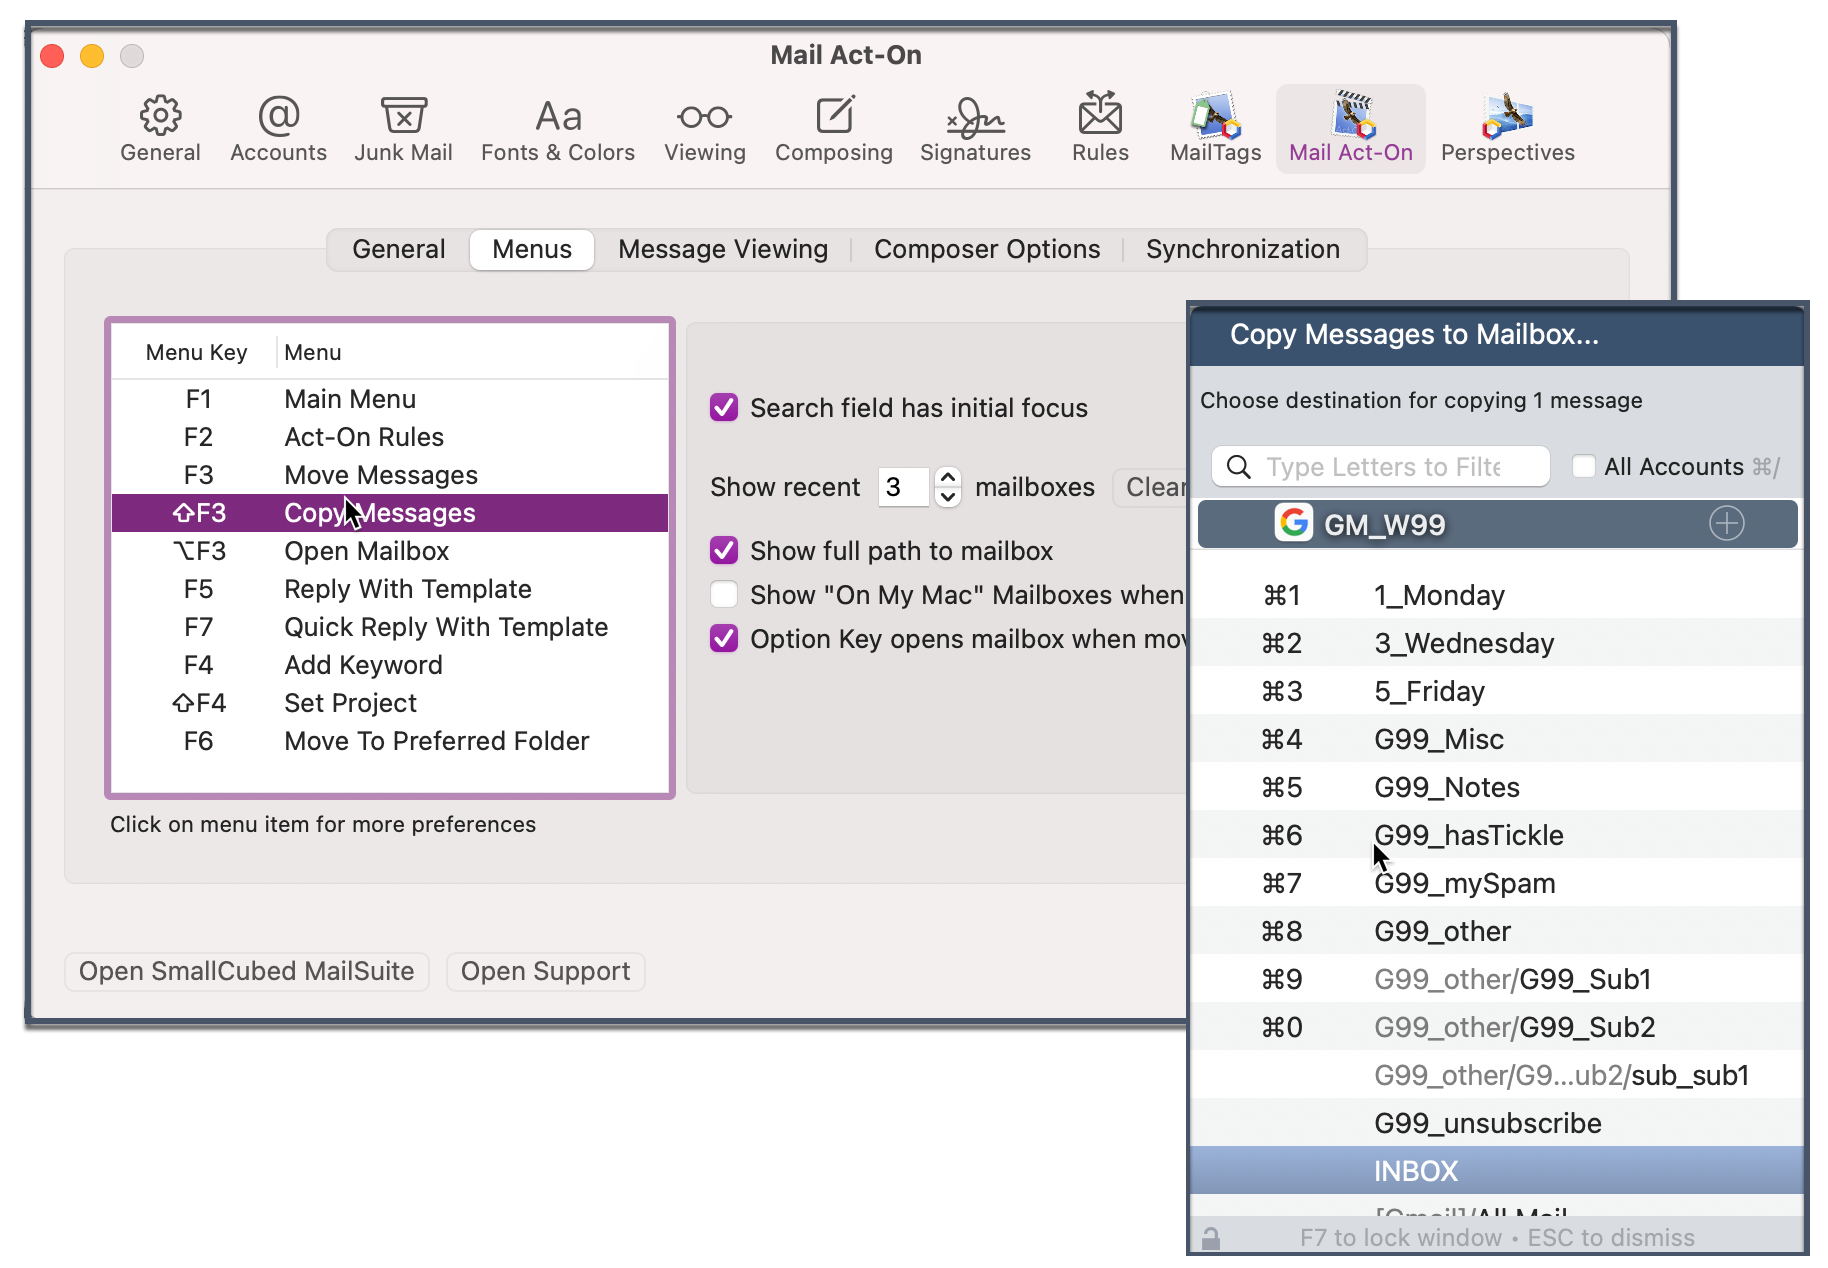
Copy message to Mailbox … works much the same as Move messages to Mailbox…, except that it copies the message rather than moves it. With Copy Messages to Mailbox… you can also filter your lists using the Search field and use command + forward-slash (⌘ + /) to toggle between displaying “All accounts” and only the account for the messages.
As with Move Message to Mailbox…, you can combine copying the message and going to the mailbox by holding the option key ( ⌥ ) when selecting the mailbox.
The default settings for Copy Messages to Mailbox…are also very similar to the ones for Move Message to Mailbox…, and are in the Menu tab of the Mail Act-On settings.
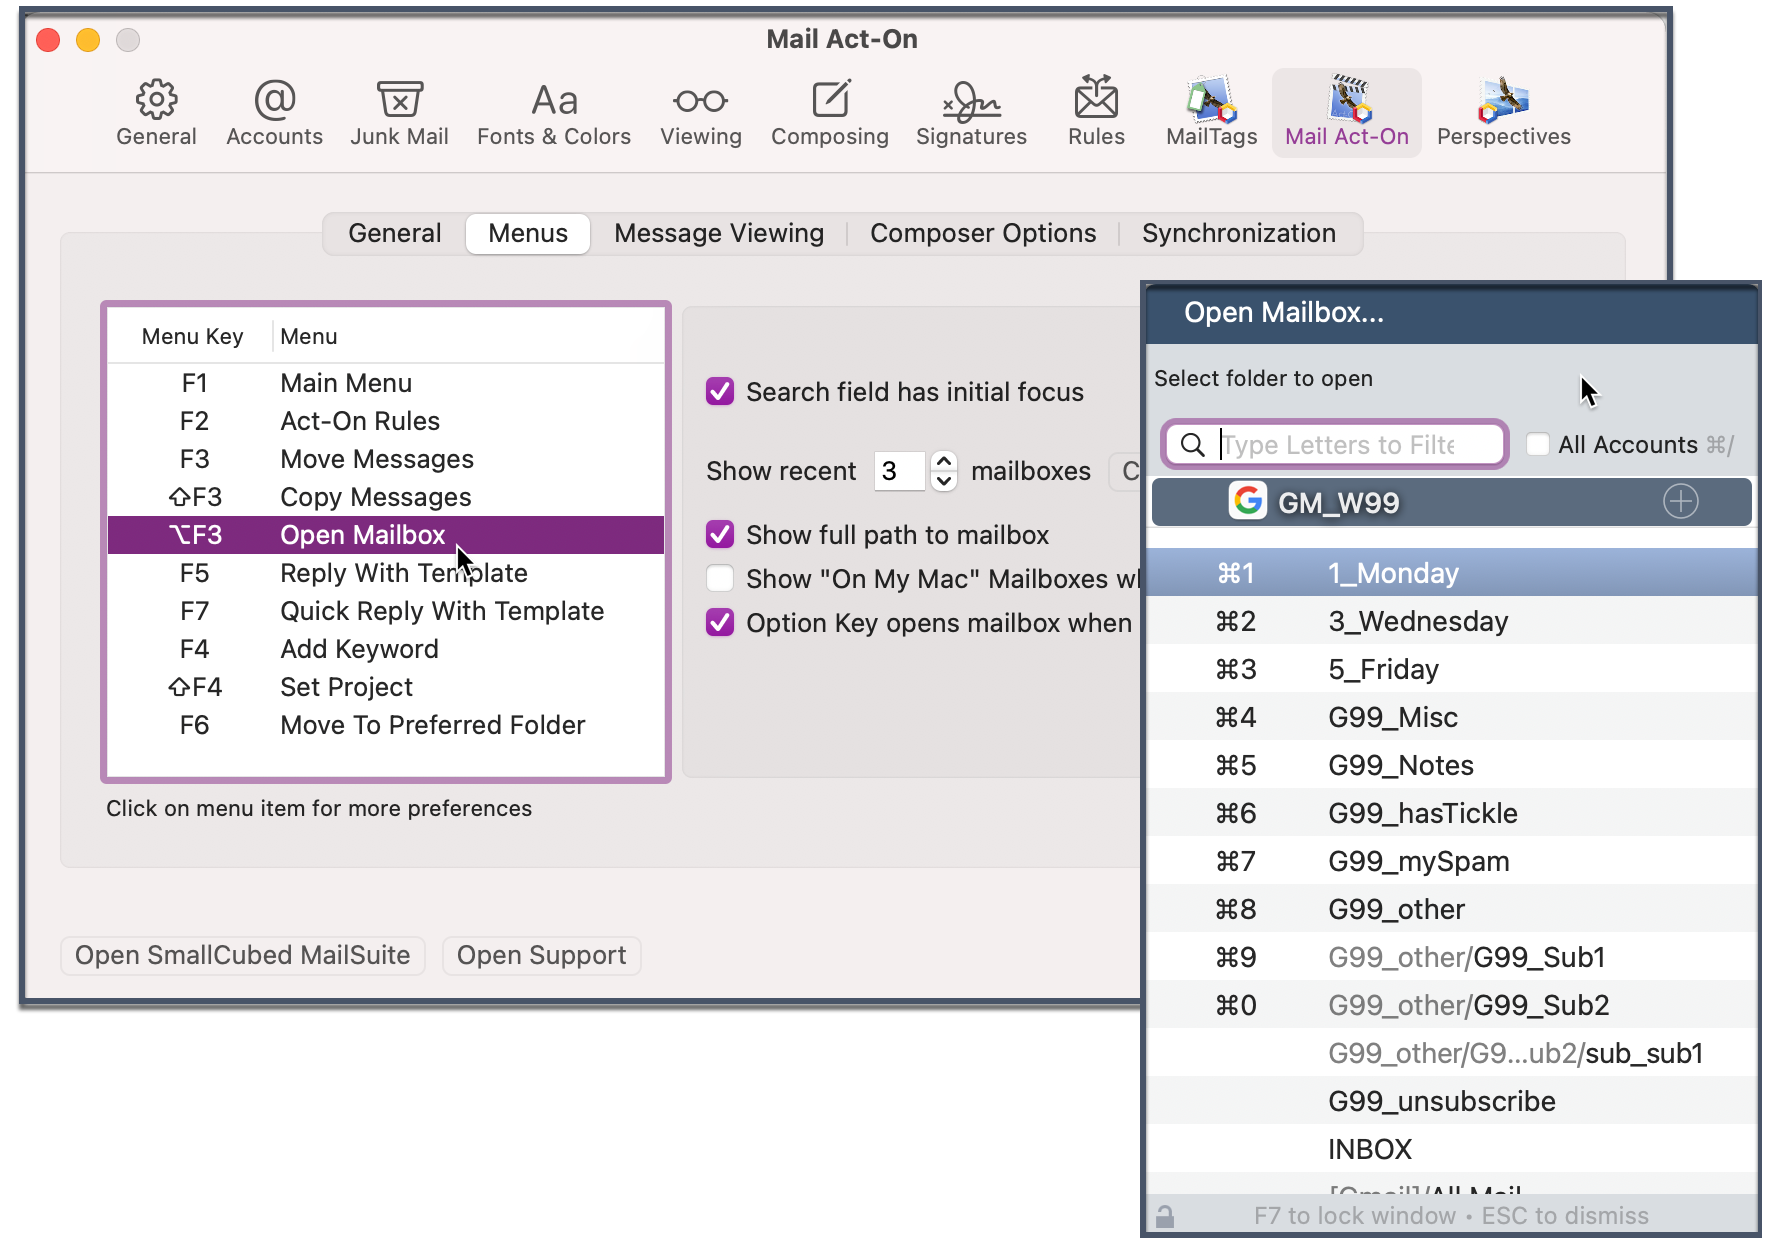
Sometimes, you don’t want to move or copy a message to a mailbox; you want to go to a Mailbox. Open Mailbox… does just that. It has all the same options as Copy Messages to Mailbox… and Move Message to Mailbox…
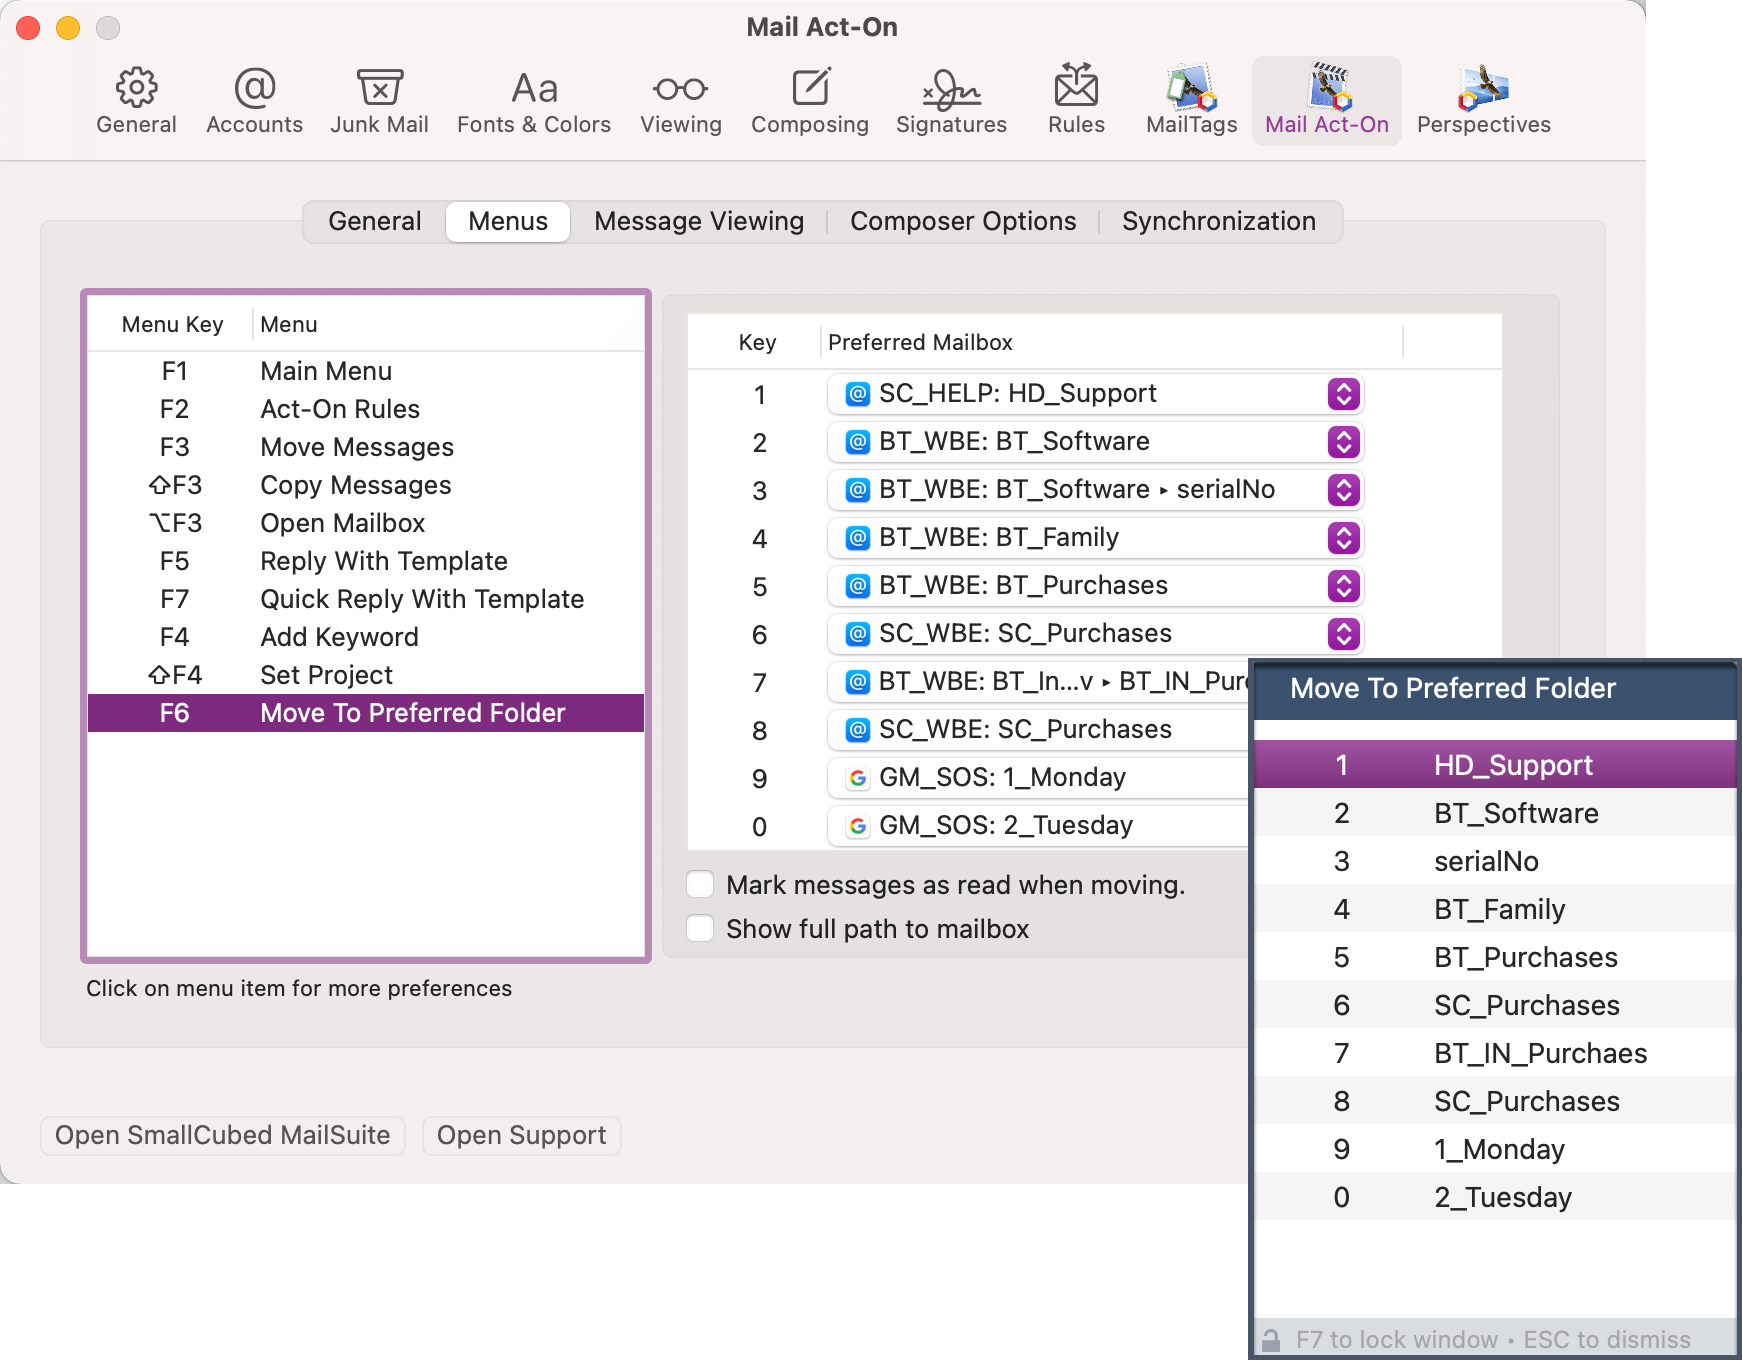
With Move To Preferred Folder, you can define up to 10 mailboxes to quickly move messages.
From the Move To Preferred Folder window, you can use just the number to select the message’s destination. Because the number for each mailbox never changes, muscle memory builds to make moving messages even faster.

Add keyword to Messages…(F4) & Set project on Messages.. are only visible if you have MailTags installed. They allow you to quickly add Keywords or Projects to selected messages using the list of Keywords or Projects found in the Keywords and Projects tab of the MailTags settings.
You can filter the list of Keywords/Projects available using the search field and select the tag using command + # beside Keywords/Projects.

Mail Act-On templates are created and edited in either of the Templates options of the Mail Act-On menu. Once you have created templates, you can use Reply With Template or Quick Reply With Template to reply to messages quickly.
Reply With Template pops up the selected template and allows you to make changes before sending. Quick Reply With Template(F7) will reply to the message automatically without displaying the template first.
©2026 SmallCubed • All rights reserved.